Activities involving arts and crafts are always helpful in the development of a child’s creativity and working skills. There are many ways to involve a kid in such activities and paper crafting is perhaps the most interesting way of them all. It can be done with things lying around the house and the supplies are as basic as scissors, glue, paper and textile.
8 Best Paper Crafts for Kids
Paper crafts can be a simple way for you and your kids to enjoy a happy and sweet time. Here are some paper crafts for kids.
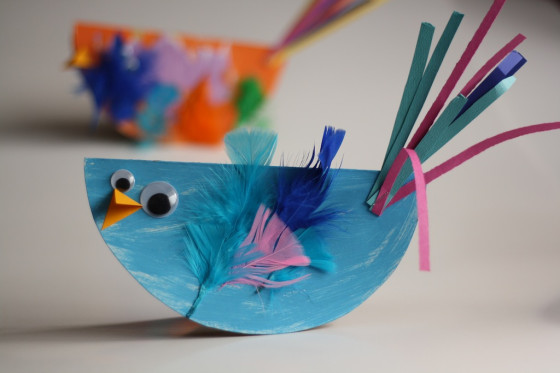
1. Rocking Paper Bird
Rocking paper birds are fun, easy and creative! In addition, best of all, these birds do rock on tapping. Make a bundle of these, place them besides a window, and let the gentle breeze work its magic on the birds.
 Materials:
- Some pencils
- Scissors
- Glue
- Soft cards
- A round object of two different diameters
- Some colored paper
Directions:
- To make the rocking birds, place the round objects on the soft cards and draw neat circles. Using your scissorscut out neat circles, glue the smaller circle on top of the larger one, and neatly fold them in half.
- Next cut out a small triangle and a rectangle of form the colored paper and fold them in half, be careful to get the exact center to add neatness to the birds.
- Then, glue the triangle to make the beak and rectangle to make the tail. Now add different colors and features to elaborate the bird even more.
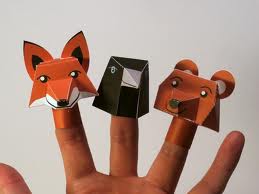
2. Origami Finger Puppets
Who doesn’t love animals! They can be made with napkins or hard paper with these easy instructions. Anyone can decorate their favorite places with animals.
 Materials:
- Crayons
- Markers
- Paper napkins
Directions:
- To make thisfirst take a rectangular piece of paper and fold it in half, reopen the paper and make a fold in the lower half of the paper by bringing the bottom corner half way up.
- Next, fold the right and left corners all the way to the bottom of paper. Then take the bottom portion of the paper and fold it all the way up, but this time extends it beyond the paper slightly.
- Then fold tips toward the center to make ears. You can carry this fold backward to make a bear shape or forward to make a dog shape.
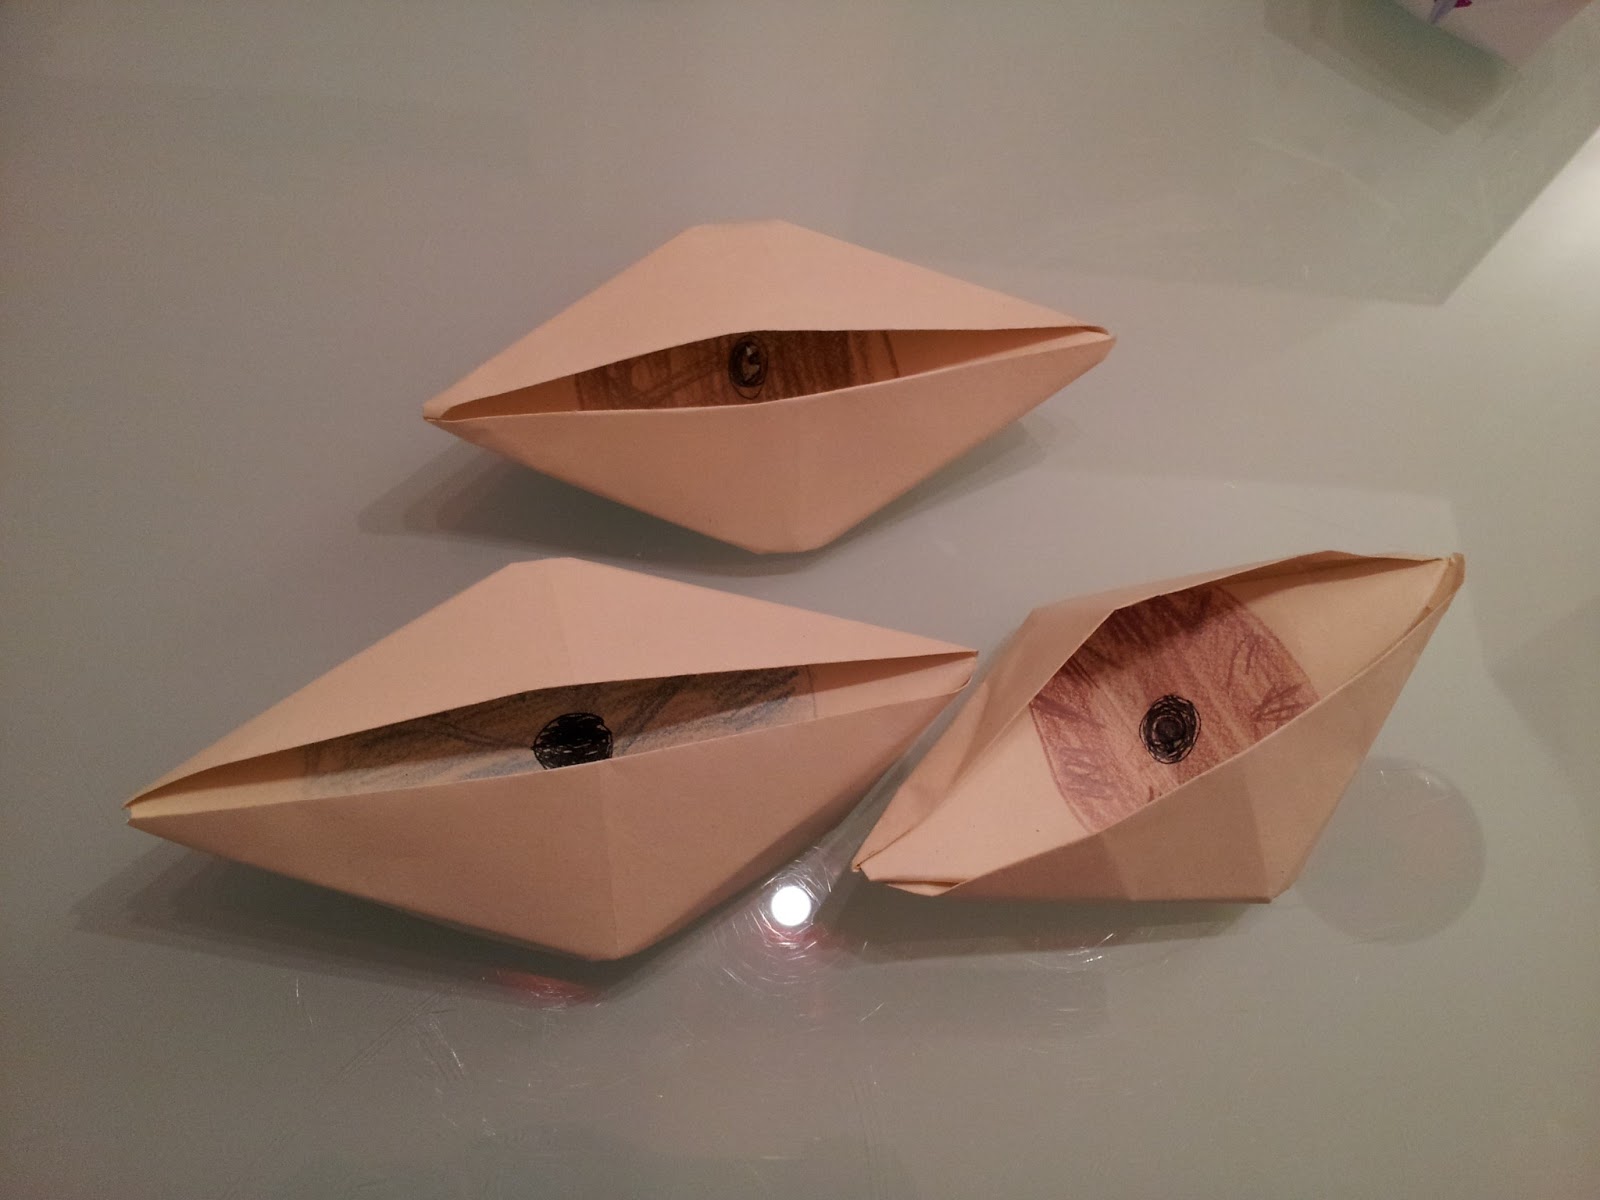
3. Blinking Origami Eye
This eye will blink and watch all your activities, so be careful around this origami.
 Materials:
- A piece of paper
- Some markers
Directions:
Grab a piece of paper and place it diagonally in a kite like fashion. Fold the paper longitudinally and unfold. Then fold the paper horizontally and then unfold again. Then fold the top and bottom corners to the central point.
Next, refold the upper and lower quadrants into halves again and reopen all the folds. Refold the upper and lower folds up until the first half is in the center, and then draw a pupil in the center to complete the look.
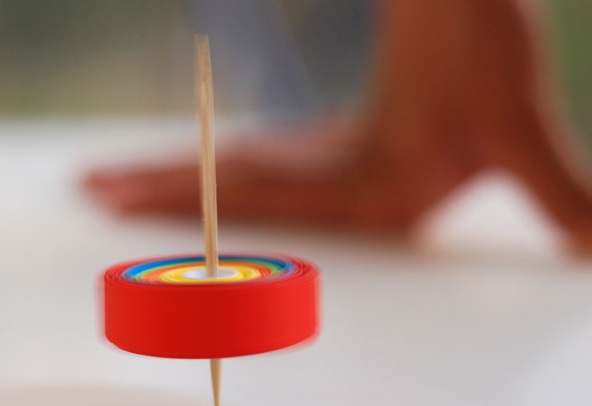
4. DIY Paper Spinner
These colorful spinners are engrossing both to make and play with.
 Materials:
- Paper strips
- A toothpick
- Some glue
Directions:
Make equal strips of different colors and using glue on one side then start rolling them around the toothpick in leveled circles. In this manner, keep adding strips of different colors; after rolling all the strips, dry the glue and your spinner is ready.
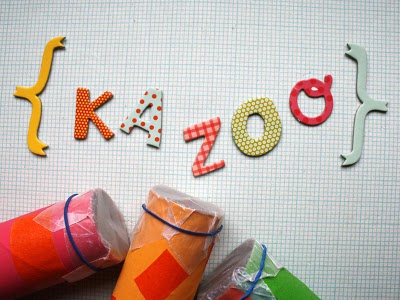
5. Cool Kazoos
This musical instrument is just what the kids need to play with to stay engaged, being either alone or in a company. A kazoo is the perfect device to make a music, be it the sound of radio or bees or a marching band.
 Materials:
- Markers
- Paper towel roll
- Wax paper
- Rubber bands
- Scissors.
Directions:
- To make a kazoo, start by decorating the paper towel roll with whatever theme pleases you and wrap up the roll with wax paper.
- Secure the ends with a rubber band and place two, thin holes in the center, you can vary the thickness and diameter to mimic different sounds to make the play even more interesting.
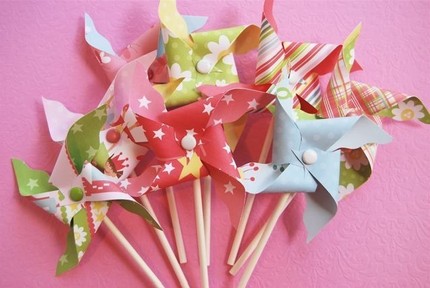
6. Clothespin Pinwheel
These miniature windmills create the most beautiful illusion when they spin in wind and they are literally held together with a common pin, so you can decorate them in any place of your choice.
 Materials:
- Pattern paper
- Scissors
- Common pin or a clothespin along with some glue
- Map track
Directions:
- Cut out two five-inch pattern papers and attach them back to back, it is best to take contrasting colors and complimentary pattern to get a beautiful effect when the mills spin.
- Next, draw diagonal lines from each corner and slice out 3 inches in each. Fold over the ends and glue them to the center to create a three-dimensional effect.
- After letting the glue dry, place a common pin in the center to attach in the desired place.
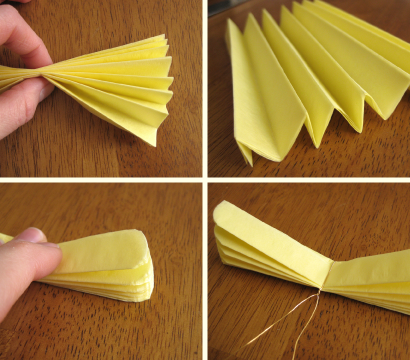
7. Folding Flowers
Folding flowers can be simple and elegant decorations for any vase or pot. These flowers can be made in all shapes and sizes and best of all, they do not need any watering!
 Materials:
- Thick skewers,
- Fancy buttons,
- Pattern or simple papers
- Some glue
Directions:
Take a plain or patterned paper and start making equidistant folds by placing the folds inwards and outwards alternatively. Joint the ends to make a circle and use the glue attach a button in the center. Then apply some glue at the back of the fan to attach the skewer to complete the look.
8. Paper Necklace
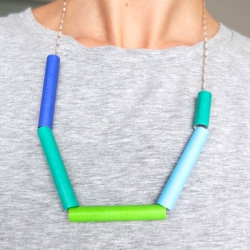 These paper necklaces are simple, colorful and extremely funky to carry around. It is a great activity to do in a group as it does not need any extensive materials.
Materials:
- Colorful hard paper sheets
- A long chain
- Some glue
Directions:
- Cut around 4 to 5 cm of paper, take a pen or paper of appropriate size, and start rolling. Make sure the rolls are tight and well fastened with each other; when you have made about five turns, stop and glue the ends together.
- Hold the paper tightly till the glue dries, cut off the excess and more on to a different color but this time vary the size by increasing or decreasing the length of the roll.
- Once all pieces are ready, pass them into a chain to form a necklace.
If you want to learn some more creative paper crafts for kids, watch the video below: