Does your child enjoy crafting? If so, you should nurture their creative spirit. By just buying some inexpensive supplies for crafting, you will have equipped your child with the necessary tools to spark creative imagination. It takes just a few minutes for both you and your child to craft a beautiful piece, and you can have fun in the process. Listed below are some fun and easy crafts for kids.
9 Easy Crafts for Kids
1. Paper Lantern
?Age: Over 8 years old.
?Things needed: Paper (8.3 inches x 11 inches) which can be construction paper, bond paper or cardstock, pencil, ruler, scissors, crayons or markers and tape or staple.
?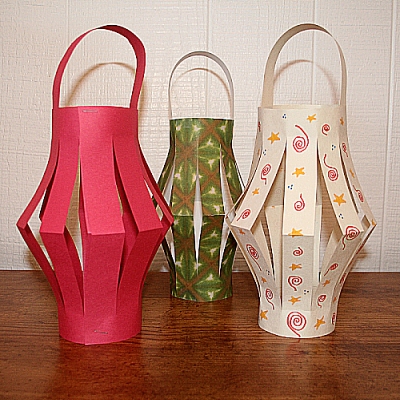 How to make this easy craft: Take the ruler and make a ¾ inch straight line from one of the 6.5 inch edges. Cut off the strip and put it aside. It will be the handle of the lantern. Fold paper lengthwise in half, ensuring that all edges are lined up. Draw a ¾ inch line at the long edge of the paper. Take the scissors and cut a strip from folded edge to the line your first drew. Cut the strip about ¾ inches away from the short edges and continue cutting several strips. Unfold the paper, then refold it lengthwise to make the pencil mark inside. Embellish or color the outside of you lantern. Roll the paper over to a tube shape for the assembling of the lantern. Staple the edges and the handle of the lantern together.
2. Marshmallow Sculptures
?Age: 5 years and above.
?Things needed: Marshmallows and toothpicks.
?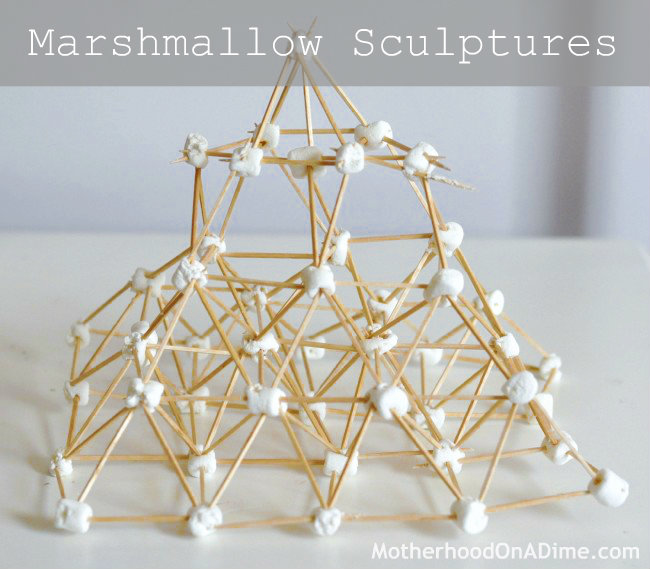 How to make this easy craft: Start making the sculptors in two dimensions. You just take a marshmallow and pin it to another marshmallow using a toothpick. The toothpick will be the boundary between each marshmallow and the next one. As you do this, engage your child in an educative conversation about the difference between 2D and 3D, and let him explore different shapes. You can make structures as big as you want. The bigger the structure, the more the marshmallows and toothpicks you will need. This is also a good time to teach your child about the different shapes and sizes, and you can ask him to make some shapes and name them.
3. Bagel Bird Feeder
?Age: Over 5 years old.
?Things needed: Scissors, string, stale bagel (1/2), peanut butter (a teaspoon), shortening (a teaspoon) and bird seed.
?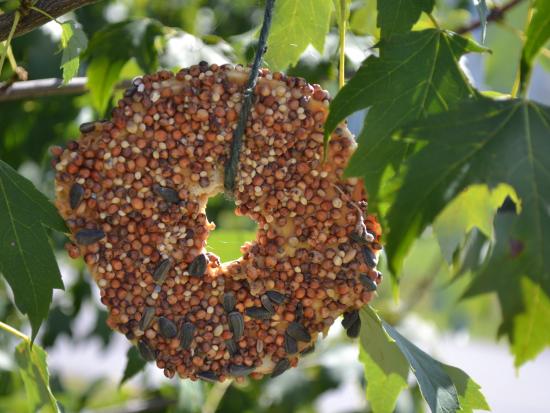 How to make this easy craft: Take one string end and put it through the bagel hole and then tie both ends together. Mix the shortening and peanut butter, and spread the mixture on one bagel side. Pour the bird seed on a flat surface or a plate, and then press the bagel side that has the mixture on the seeds. Hang the end product anywhere outside like on a tree and watch as birds devour it.
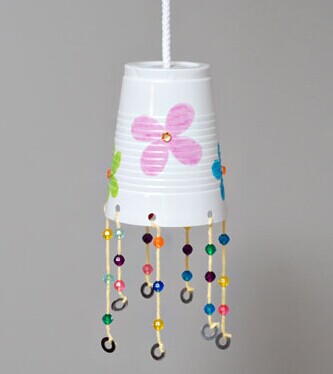
4. Mushroom House
?Age: 3 years and above.
?Things needed: Paper bowl, paper cup, scissors, marker or stickers, glue or tape, paint and paint brush.
?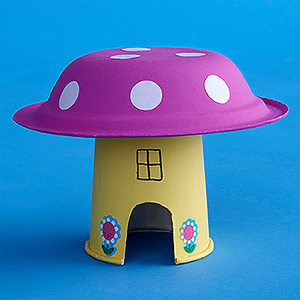 How to make this easy craft: Take the paper cup, turn it upside down, and then cut out the part that will be the door. Take the marker and draw flowers and windows to decorate the cup. Your child could even use stickers to add some beautiful decorations. Paint the cup’s outside and set it aside. Take the paper bowl and paint its underside. When the paint dries, paint big white dots to resemble a mushroom. Tape the two pieces together from the inside of the cup. Doing this is a great way to boost your child’s imagination.
5. Butterfly Card
?Age: 3 years and above.
?Things needed: Scissors, pencil, construction paper, glue stick, a hole punch, crayons or markers and glitters.
?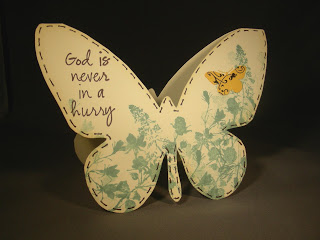 How to make this easy craft: Take two pieces of construction paper and fold them in half. Take one card and put it inside the other card. At the fold of one of the cards, draw a half butterfly.While both cards are still together, cut along the half butterfly line to end up with two half butterflies. Take one of the butterflies then fold it into two, and draw an even smaller butterfly inside and cut along the butterfly’s line. Take the hole punch and make several holes along the butterfly’s wings. Glue a smaller piece of the butterfly under the bigger piece, and then flip it over and glue the other pieces the same way. Cut a brown or black body for your butterfly and glue it in the inside of your butterfly. You can also ask your kids to write something on the card as they like.
6. Train with Tracks
?Age: 3 years and above.
?Things needed: Wooden blocks, painted wagon-wheel pasta (6 pieces), wooden spool, scissors, paint, paint brush, glue and cotton tuft.
?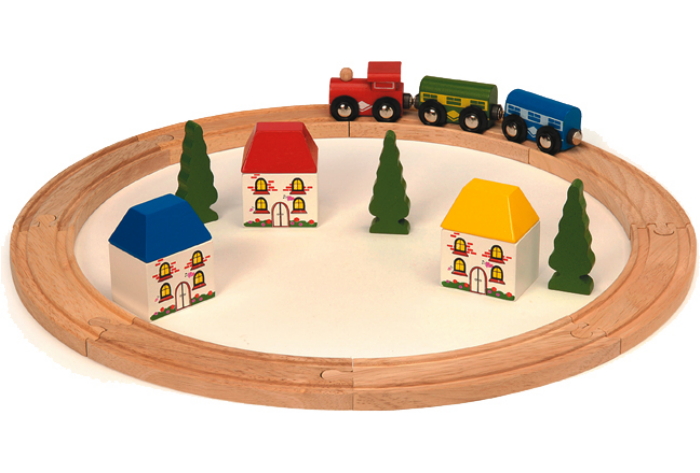 How to make this easy craft: Cut rectangular chipboard and it will be the train’s top and ask your child to paint it. When the chipboard has dried from the painting, glue the pieces together. Take the cotton tuft and glue it to the spool. For the tracks, take chipboard and cut it into strips. They should be slightly wider than a mini craft stick’s length. Glue the mini sticks together at short intervals along a strip. To make it more fun, make many sets of tracks and ask your child to place them together.
7. Wind Chimes
?Age: 3 years and above.
?Things needed: Craft sticks (10 pieces), glue, string, clothespins, paint and paint brush.
? How to make this easy craft: Ask your child to paint 10 craft sticks in different colors. Take 5 craft sticks and apply glue on them. Take a string and sandwich it between one unglued stick and another glued stick. Clip them together using clothespins so that the glue can hold securely and leave it to dry. Take one unpainted craft stick and lay some glue on it. Stick the five strings along the unpainted craft stick and hold it with a clothespin. Once it has dried, cut off excess string and hang the wind chime wherever you want.
8. Sequined CD Fish
?Age: 2 years and above.
?Things needed: Glue, 2 CD’s, sequins, scissors and cardstock.
?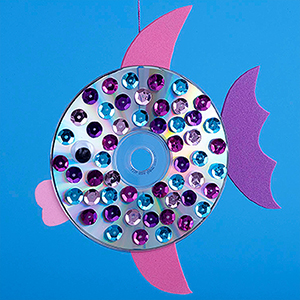 How to make this easy craft: Glue a googly eye to both iridescent sides of the CDs. Add drops of tacky glue and ask kids to attach the sequins to the drops on both CDs. Take a cardstock and cutout lips and fins and stick them to one CD’s non-iridescent sides. Determine the twine length you need for hanging the fish and double it. Tie the two ends together and glue the twine to top of one of the non-iridescent sides of one CD. Adhere both CD’s together and line up the fish eyes.
9. Leaf Doodling
?Age: 2 years and above.
?Things needed: Metallic pens, leaves and mod-podge glue (optional).
?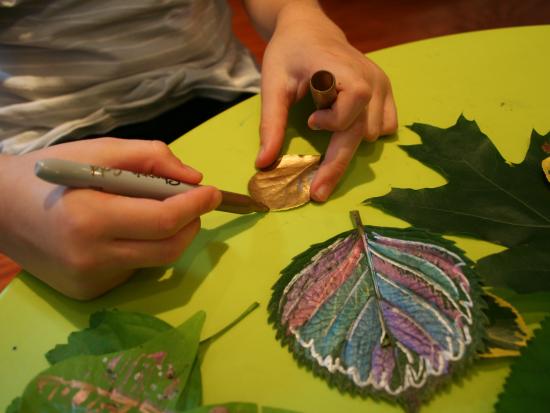 How to make this easy craft: Collect leaves with your children during walks. Take the metallic pens and start coloring the surface of the leaves in different colors. If you are coloring the leaf in one color, leave out the veins and color them in different colors. Make sure that you use light touches when painting. You can use as many colors as you want. This encourages creativity in your children. They will also learn how to blend colors well. Once all the leaves have been colored, take a cardboard, apply some glue on the unpainted side of the leaves and stick the leaves on the cardboard.
If your little girl loves flowers, you can learn an easy craft together with her from the video below: