 Science fair is an opportunity for students to demonstrate their ability to do research and apply scientific method. Students come up with different research objectives and projects and then on completion of their research present it in the science fair. Usually, such science fairs are held on the level of school or are sponsored as local science fairs. The students who are deemed to have done their research properly are awarded prizes in the fair as well as are given the chance to participate in science fairs held at regional, state, national and international levels.
What Does a Science Fair Project Consist Of?
A project completed on school or local level comprises of three required constituents. These required elements include a display unit, materials for your project and a written report. In combination, these three things are meant to provide the complete information about the knowledge or area researched in the project, or in case of an experiment, these should provide the result of the performed experiment.
1. Display
Display backdrop is the first thing that comes in the notice of people coming to the exhibition. It must be designed professionally to catch the interest of visitors and gain their recognition. The display unit, normally a blackboard, is present behind the table on which the main exhibit material for the project is placed.
2. Materials
The exhibit materials as well as devices and samples should tell a story, showcasing the idea or concept researched or experimented in the project by the student. The elements present on the table in front of the display board should illustrate completely the items that came up during the student’s investigation.
3. A Report
A written report is the most important part of the project as it provides proof of the understanding of the student and also gives the observers at the fair, data to verify the working of the project. A written report should include all the data and information collected and gained by the student during the weeks prior to the fair.
8 Easy and Cool Science Fair Projects
Here are few cool science fair projects which students can undertake to understand scientific concepts in a fun and exciting way.
1. Egg Drop
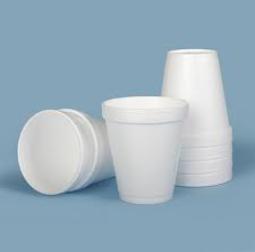 a) Aim: In this project, students will learn Newton’s First Law (Inertia) and gravity.
b) Materials: The materials needed to perform the experiment are eight styrofoam cups, eggs, strong tape, small rock or stone.
c) How to make it:
Note: there are lots of ways to do this experiment. Here we only introduce one of them-the way with styrofoam cups.
- Take one cup and mark it No. 1, then put a small rock in it.
- Pile up 6 more cups on the top of cup No. 1 and place your egg in the seventh cup.
- Put the last cup on top of the egg cup, and ensure it can keep the egg in the position.
- Use the strong tape to secure the down sides of the cup piles so that the cups will not come apart when falling.
- Before you start to drop the egg, double check it that all the cups should be in one stack, and the cup with the egg in is on the top and the cup with the small rock inside is on the bottom.
2. Potato-powered Clock
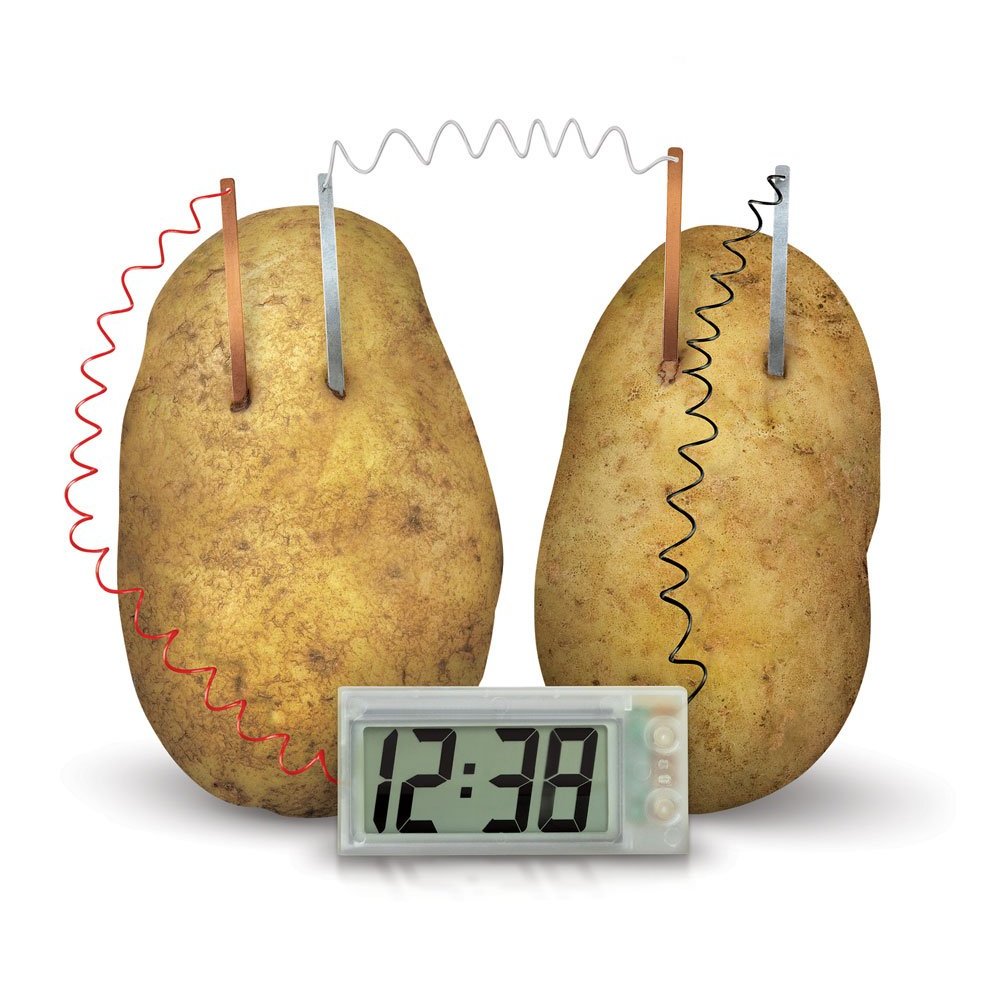 a) Aim: In building this project, students will learn to produce electrical energy from chemical energy.
b) Materials: The material needed for the project include a 1-2 volt battery operated LED clock, 2 potatoes, 2 short heavy copper wires, 2 galvanized nails and 3 alligator clip connected wires.
c) How to make it:
- Make note of the positive and negative side of the battery while removing it from the clock, then mark each potato as ‘1’ and ‘2’.
- A galvanized nail should be placed in each potato.
- Place a copper wire into each of the potatoes, keeping them far away from the nail.
- Place an alligator clip between copper wire in potato1 and plus the positive terminal of the clock’s battery section. Another clip should connect copper wire from potato 2 to the negative terminal of the battery without touching any other metal component in that section.
- Connect the last remaining alligator clip between potato 2’s copper wire and potato 1’s nail. Once all is done, set the clock and enjoy watching your project work.
3. Fossil Cast
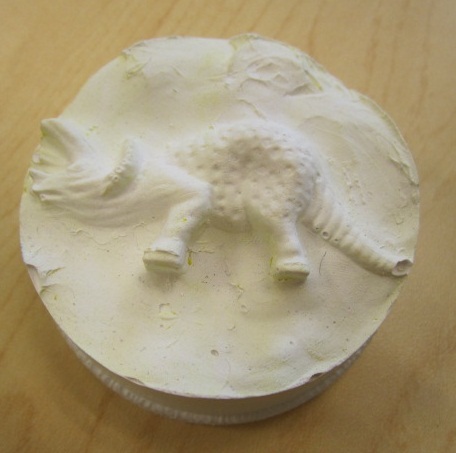 a) Aim: The aim is to make students learn how to make fossils and how scientists decode information from fossils to know about historical events.
b) Materials: The things required to complete the project are water, plaster of Paris, 2 paper cups, an object whose impression is to be created and plasticine.
c) How to make it:
- A ball of plasticine should be placed in a paper cup with the smooth side up.
- The object to be fossilized should be half buried in the plasticine and then should be removed from the cup.
- Prepare plaster of Paris in the other cup by mixing its half cup with a quarter cup of water.
- When the mixture of plaster of Paris has hardened, pour the mixture in the plasticine cup and wait till the mixture completely hardens.
- Once plaster becomes completely hard, you should cut apart the paper cup and get the plasticine with plaster out of the cup.
- This is your fossil complete which you should place in a dry place.
4. Elephant Toothpaste
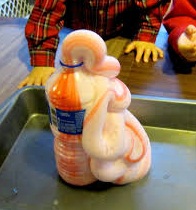 a) Aim: The aim of the experiment is to make students learn to produce foam as well as heat. This will help them understand exothermic reactions.
b) Materials: All you need to carry out the experiment is a cup, food coloring, dish washing liquid, warm water, dry yeast, a plastic bottle, half a cup of hydrogen peroxide liquid.
c) How to make it:
- Start by wearing safety goggles since hydrogen peroxide can irritate your skin and eyes.
- Pour hydrogen peroxide in the plastic bottle and follow it with 8 drops of food color.
- Add about a tablespoon of the dish washing liquid and then mix the contents of the bottle.
- Prepare a yeast mixture by adding it to warm water in a small cup.
- Once everything is ready, start the foam-making experiment by adding yeast mixture in the bottle and see all the foam being produced. You will notice the bottle becoming hot while foam is being produced.
5. Cloud in a Bottle
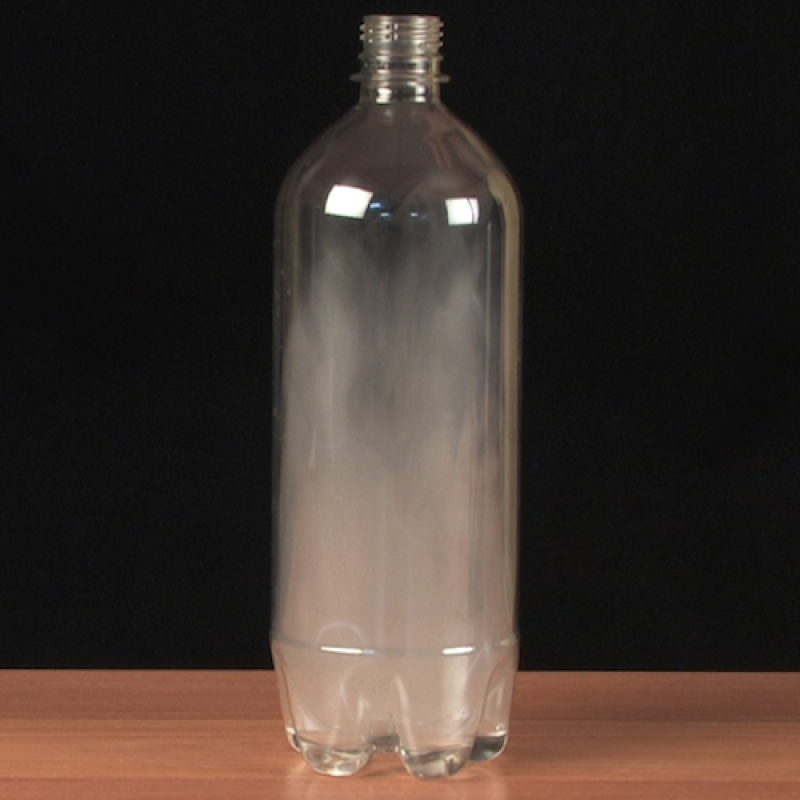 a) Aim: Students can learn the way clouds are formed in the sky.
b) Materials: Warm water, matches and a plastic water bottle is all that is required to make your own clouds in a bottle.
c) How to make it:
- Start by pouring water in the bottle and leaving it open, then produce smoke by blowing out a light match.
- Get the smoke in the bottle by squeezing it two to three times, before putting the cap on.
- Squeeze the bottle again and then release, you may watch clouds in the bottle.
- If clouds are not produced, repeat the process a few times and you will definitely see clouds forming.
6. Soapy Surface Tension
 a) Aim: The project help student understand the concept of surface tension and the impact of soap on water’s surface tension.
b) Materials: A plastic cup, liquid soap, water, a few pennies and an eye dropper are all things that are required to perform this simple yet interesting experiment.
c) How to make it:
- Get a cup filled with water, and then suck a few drops of water in the dropper.
- Pour out drops from the dropper on a penny and count the number of drops before water spills from the penny.
- Add soap to the water in the cup and recount the number of drops before water spills from the penny. This difference in number of drops is caused by the change in surface tension of water.
7. Tea Bag Rocket
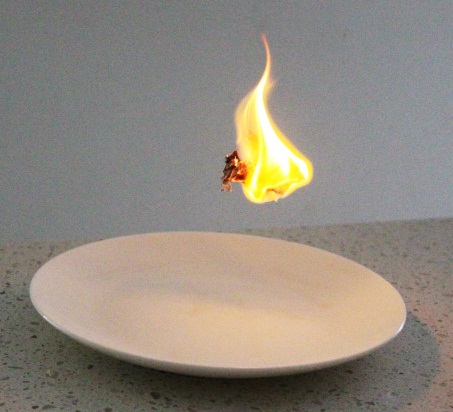 a) Aim: Students learn concepts like convection and air density comparison from this experiment.
b) Materials: A tea bag, scissors, match, a non-flammable surface and safety glasses can be used to produce a tea bag rocket.
c) How to make it:
- Open the tea bag.
- Remove tea from it and fold it like a cylinder.
- Place the cylinder on a nonflammable surface and light up the top of the cylinder.
- The flame will move down the cylinder and as it reaches down the cylinder, it will take off like a rocket.
8. Underwater Pressure
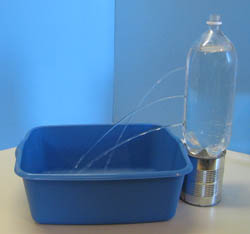 a) Aim: This project will help students understand the pressure exerted on an object placed in water.
b) Materials: Water, masking tape, marker, a ruler, a nail, scissors and a capped soda water bottle along with a helper can help complete the project to understand underwater pressure.
c) How to make it:
- With the help of a ruler, write 3 marks on the bottle at 3 inch, 5 inch and 8 inch from the bottom.
- Put a nail through each mark to make a hole.
- Cover the holes you created with a tape and completely fill the bottle with water.
- Remove the tape from holes and see the water flowing from each hole to know about pressure under water.